This is after today’s exam, I summarize my experience and tutorial of making the site adapt to PWA.boring
What is PWA
PWA (Progressive Web App) is a technology and method used to develop web applications. PWA combine the best features of traditional web apps and native mobile apps to provide a better user experience.
PWA can be accessed through a browser and do not need to be installed on the device, but they have similar functionality and features to native apps. PWA make use of APIs provided by web browsers, such as Service Workers and Web App Manifest, to enable applications to work offline, push notifications, and add to the home screen. These features allow PWA to run in a consistent way across platforms and devices, without the need to download and install them from the app store.
Learn more about PWA
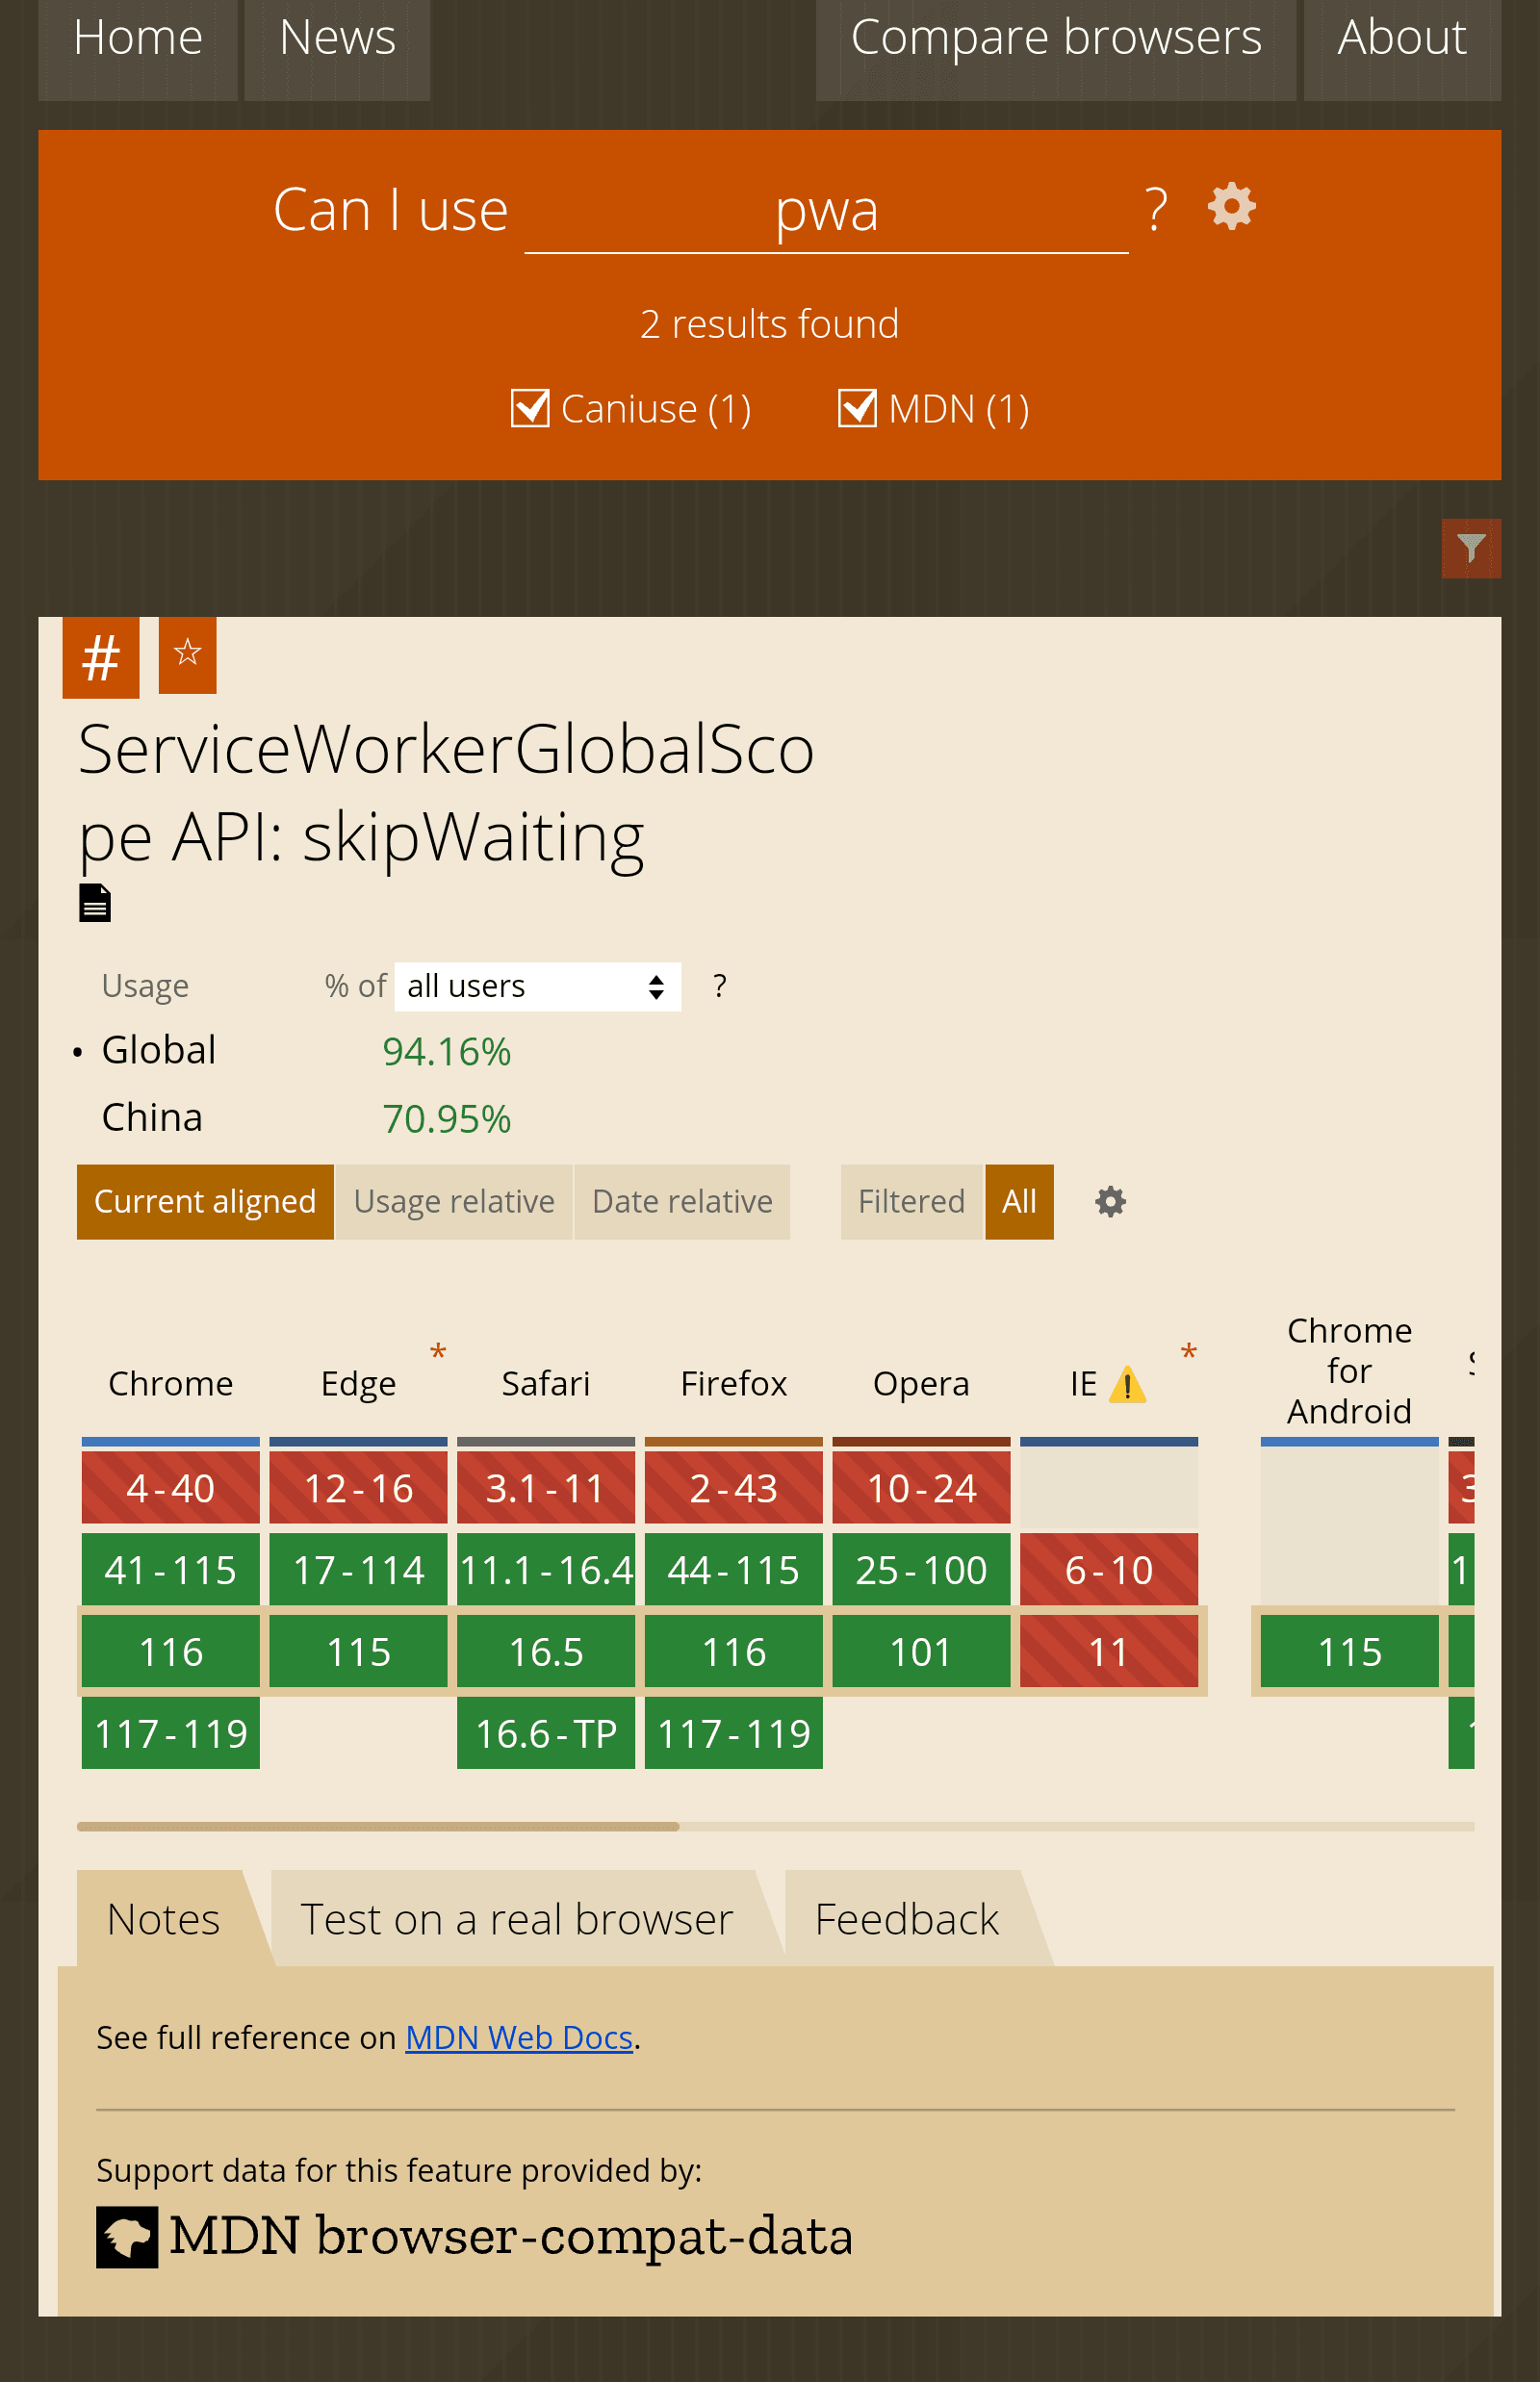
Check if your browser supports PWA
I recommend checking on caniuse.com to see if a browser supports PWA
Link
When you open the website, the page looks like this ▽

Build a PWA
In short, build a PWA to a website can be done in the following steps:
- Full-site HTTPS
- Code
manifest.json and sw.js
- Prepare app icons for 192×192px and 512×512px
- Bring in
manifest.json files and sw.js files on relevant pages of your website
Next is my own practice.
manifest.json
 1
 2
 3
 4
 5
 6
 7
 8
 9
10
11
12
13
14
15
16
17
18
19
20
|
{
  "name": "春树暮云", // the name that start screen displays
  "short_name": "春树暮云", // the name of the PWA
  "theme_color": "#f6ffff", // theme color
  "background_color": "#f6ffff", // background color
  "display": "fullscreen", // starting transition animation, standalone or fullscreen
  "scope": "/",
  "start_url": "/", // start page's URL
  "icons": [
        {
            "src": "192.png", // Rewrite according to the path of your icon
            "sizes": "192x192",
            "type": "image/png",
        },
        {
            "src": "512.png",
            "sizes": "512x512",
            "type": "image/png"
        }
  ],
|
The above code can be changed according to the actual situation.
sw.js
 1
 2
 3
 4
 5
 6
 7
 8
 9
10
11
12
13
14
15
16
17
18
19
20
21
22
23
24
25
26
27
28
29
30
31
32
33
34
35
36
37
38
39
40
41
42
43
44
45
46
47
48
49
50
51
52
53
54
|
'use strict' // Declare that the entire script is in strict mode
const cacheName = 'PWA-cache'; // the name of the cache
const startPage = 'https://example.com';
const offlinePage = 'https://example.com';
const filesToCache = [startPage, offlinePage];

const neverCacheUrls = [/admin/];// Never cache directories, such as the "Admin" folder in Typecho

self.addEventListener('install', function(e) {
  console.log('Cache event!')
  e.waitUntil(
    // When installing, cache the files that need to be cached
    caches.open(cacheStorageKey).then(function(cache) {
      console.log('Adding to Cache:', cacheList)
      return cache.addAll(cacheList)
    }).then(function() {
      console.log('Skip waiting!')
      return self.skipWaiting()
    })
  )
})

self.addEventListener('activate', function(e) {
  // Determine whether the address needs to be requested in real time, and if so, continue to send the request
  console.log('Activate event')
  e.waitUntil(
    Promise.all(
      caches.keys().then(cacheNames => {
        return cacheNames.map(name => {
          if (name !== cacheStorageKey) {
            return caches.delete(name)
          }
        })
      })
    ).then(() => {
      console.log('Clients claims.')
      return self.clients.claim()
    })
  )
})

self.addEventListener('fetch', function(e) {
  // When a cache resource is matched, the data is returned from the cache
  e.respondWith(
    caches.match(e.request).then(function(response) {
      if (response != null) {
        console.log('Using cache for:', e.request.url)
        return response
      }
      console.log('Fallback to fetch:', e.request.url)
      return fetch(e.request.url)
    })
  )
})
|
Ingest files
Ingest manifest.json in the <head> tag.
1
|
<link rel="manifest" href="manifest.json" crossorigin="anonymous" />
|
Then, check whether the serviceWorker is registered in the tag <body>.
 1
 2
 3
 4
 5
 6
 7
 8
 9
10
|
<script type="text/javascript">
    if (navigator.serviceWorker != null) {
        navigator.serviceWorker.register('sw.js')
            .then(function(registration) {
                console.log('Registered events at scope: ', registration.scope);
            }).catch(function(err) {
                console.log('Registered events at fail: ', err);
            });
    }
</script>
|
At this point, the PWA has been adapted.
However, in blogging systems such as TypeCho or WordPress, it is easy to have unsuccessful adaptation due to various reasons. At this point, you can optionally guide the user to manually configure the PWA, for example, by clicking a button.
Here’s the code:
 1
 2
 3
 4
 5
 6
 7
 8
 9
10
11
12
13
14
15
16
17
18
19
20
21
22
23
24
|
<script>
  	var deferredPrompt = null;

		// 判断用户是否安装此应用:beforeinstallprompt,如果用户已经安装过了,那么该事件不会再次触发
  	// 需要卸载,然后重新打开浏览器才能再次触发
    window.addEventListener("beforeinstallprompt", e => {
      e.preventDefault();
      deferredPrompt = e;
    });

  	// 安装完成后触发,即点击安装弹窗中的“安装”后被触发
    window.addEventListener("appinstalled", () => {
      deferredPrompt = null;
    });


    function addToDesktop() {
      // 调用prompt()方法触发安装弹窗
      deferredPrompt.prompt();
      deferredPrompt = null;
    }
</script>

<button onclick="addToDesktop()">点击安装PWA</button>
|
The demonstration is as follows:
Due to the replacement of the blog system, this link has failed, and I will try to configure PWA for this site when I have time in the future
Finally, to avoid compatibility issues, it is recommended that you place the manifest.json and sw.js files in the root directory of your website when deploying your PWA.

